Bulk document import
📥
Bulk document import
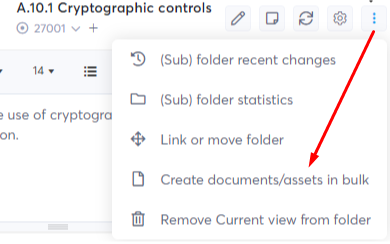
Sometimes you want to upload existing document from a local folder structure, or import assets, risks or other items that would normally take too much time to do manually. This is why we created the "Create documents/assets in bulk" import option that you can find on the folder management menu.
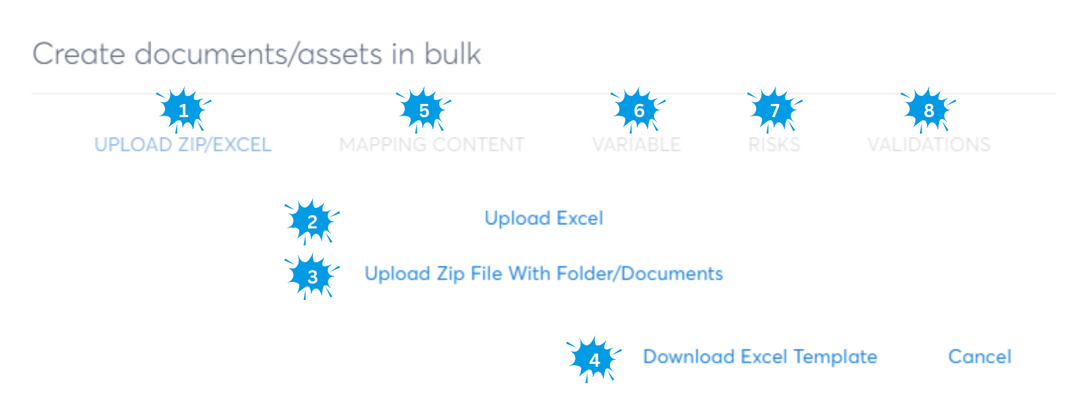
- The screenshot above is from the first step (Upload ZIP/Excel)
- Here you can upload an Excel document with multiple items that represent documents to be created inside the current folder
- Use the "Upload Zip File with Folder/Documents" to upload standard zip file of any local folders hierarchy with documents, and they will be uploaded with the same folder structure inside the current folder
- Here you can download the template used in step 2. The template has two tabs:
- The first tab of the template Excel file contains the part we'll import.
- Make sure to use the exact "DocumentType" name from the second tab in order for the mapping content (5) step to work
- You can add extra columns to be mapped to variables of your document templates which can then be mapped in the variable (6) step
- You can also use the extra columns to be mapped to measures from risk readings which can then be mapped in the risks (7) step
- The second tab of the template Excel file lists all possible document types of your workspace you can use in the first tab (Both Brainframe provided and custom workspace document types).
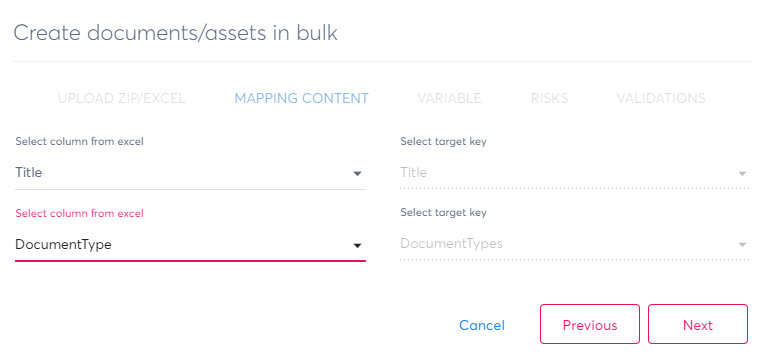
- Once you reach this step, you need to map the Excel column names to the expected values in Brainframe
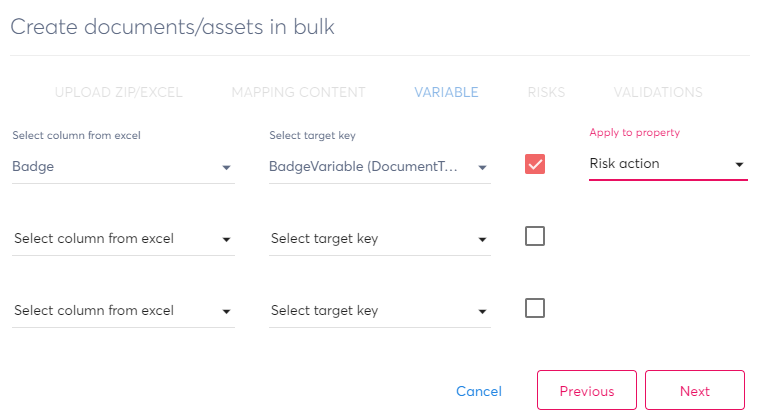
- You can also automatically fill in document template variables defined in the document types & templates, as described in 4.a from values in the first tab of the Excel which can then be mapped to the document template's variables step. By checking the checkbox, you can also assign this same values to document properties
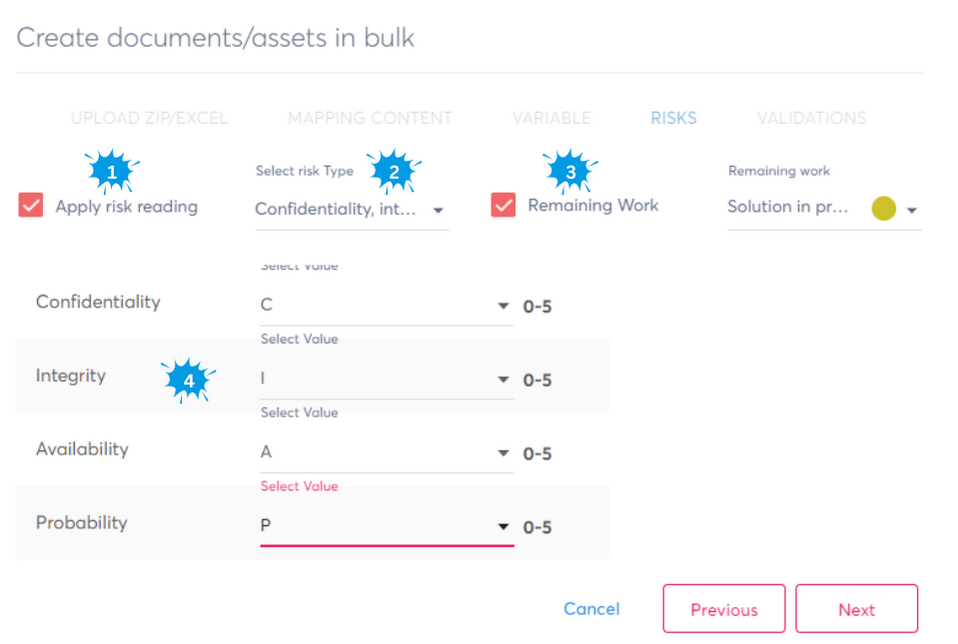
- On the risk tab you can optionally enable that on the imported documents a risk reading is done (1) by selecting the risk type (2), configure the remaining work of imported risks (3) and configure the different columns from your excel that should be used as your readings for the initial risk reading (4)
- Since there are many ways to do things wrong, we do a last validation of the import you asked for giving you indications of possible mistakes
TIP
Always try to start from our templates, and don't leave any "empty" lines at the end of the first tab to avoid errors during validation